Running VSCode on a gadi compute node#
We have successfully ran VSCode on gadi using the Remote-SSH extension. However, we are only running our scripts on a login node. We really want the ability to run VSCode on a compute node, to give us the large amounts of memory required to process large datasets.
Configuring your .ssh/config file#
Connecting to a compute node with VSCode is not trivial. Remember, the compute nodes have no external internet access! They are not visible to, or from, the outside world.
Our normal workflow for running on a compute node is either
Submitting a bash job to the PBS queue from a login node, or
Submitting an interactive job to the PBS from the login node so we can run scripts directly on a compute node.
How can we replicate the second workflow inside VSCode?
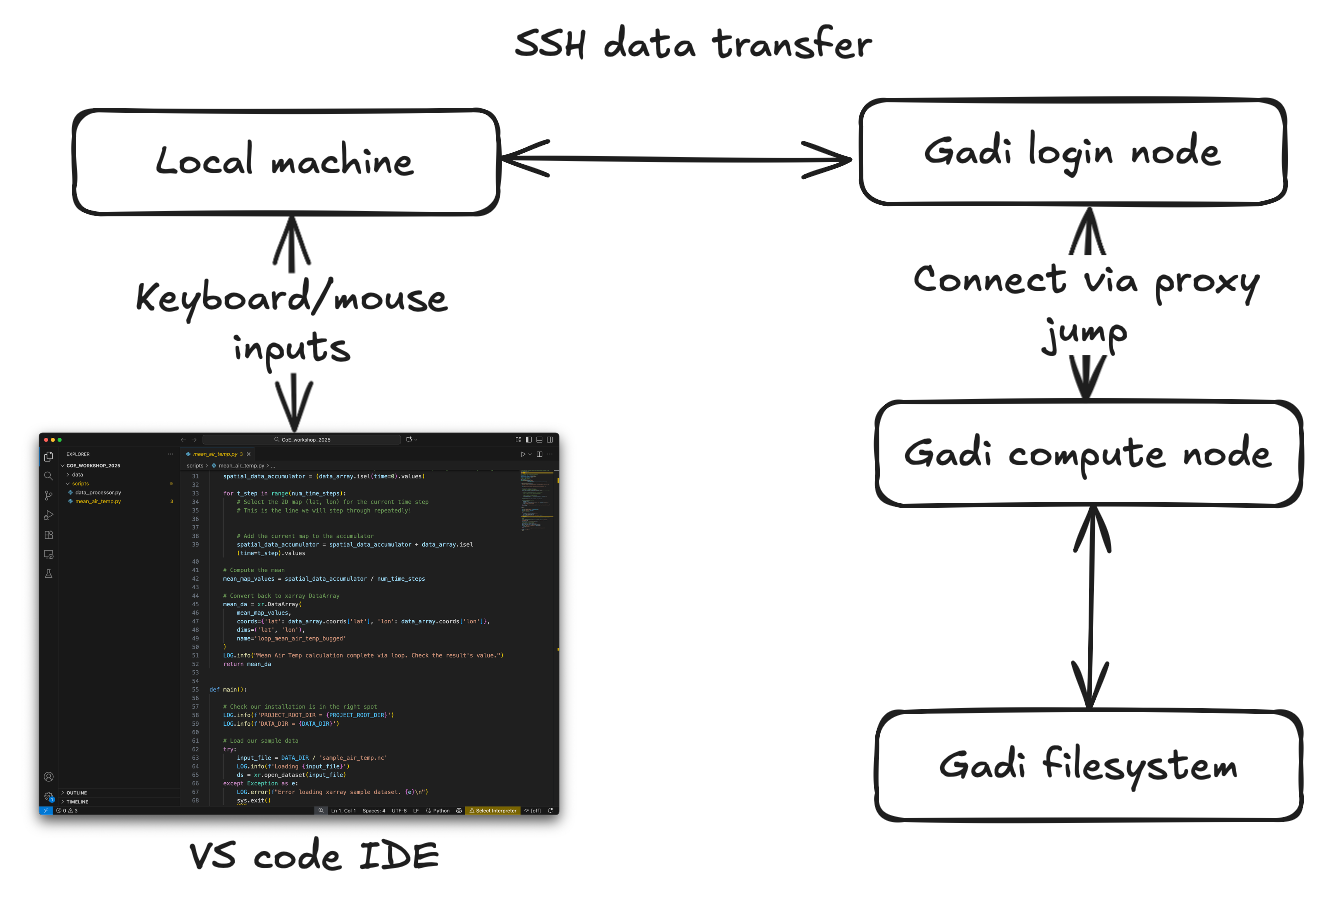
By using a neat trick called a ‘Proxy Jump’. This will allow us to
Connect VSCode to an interactive PBS job running on a compute node that we start ourselves
Automatically redirect all I/O traffic (i.e. keyboard and mouse inputs) from a compute node to our local VSCode GUI window via a login node.
Essentially we will use the login node to ‘redirect’ all traffic from our local machine to the compute node.
To start with, amend the following in your local ~/.ssh/config file so it contains both these entries:
Host gadi.nci.org.au
  HostName gadi.nci.org.au
  User <your username>

Host gadi-cpu-*
  HostName %h
  User <your_username>
  ProxyJump gadi.nci.org.au
where the ProxyJump entry is the designated Host field created earlier which refers to the login nodes of gadi.
In this example, the ProxyJump entry in the ~/.ssh/config file matches the Host definition.
Host gadi.nci.org.au
So we have configured our remote compute node e.g. gadi-cpu-clx-XXXX as the TargetHost and gadi.nci.org.au as the JumpHost.
Warning
The entry next to ProxyJump in the TargetHost must match the Host field on the JumpHost. See this example
The use of wild cards * and %h allows us to connect to any compute node that begins with gadi-cpu-, via a gadi login node. We won’t know the exact ID of the gadi compute node until we submit our interactive PBS job, and typically this will change every time we do so. So, the use of these wild card characters avoids clogging up our ~/.ssh/config file.
Now, let’s connect to a gadi login node and launch an interactive qsub session on a compute node, e.g. type the following on a gadi login node.
]$ qsub -I -l mem=96gb -Pgb02 -q normal -l walltime=04:00:00 -l storage=gdata/gb02+gdata/xp65
Note
If we want to have access to the xp65 conda environment, we have to add gdata/xp65 to the storage flag.
Tip
NCI has instructions on how to configure interactive qsub sessions here
When your interactive qsub has completed, you command-line prompt will tell you the ID of the compute node, e.g.
[<username>@gadi-cpu-clx-2592 ~]$
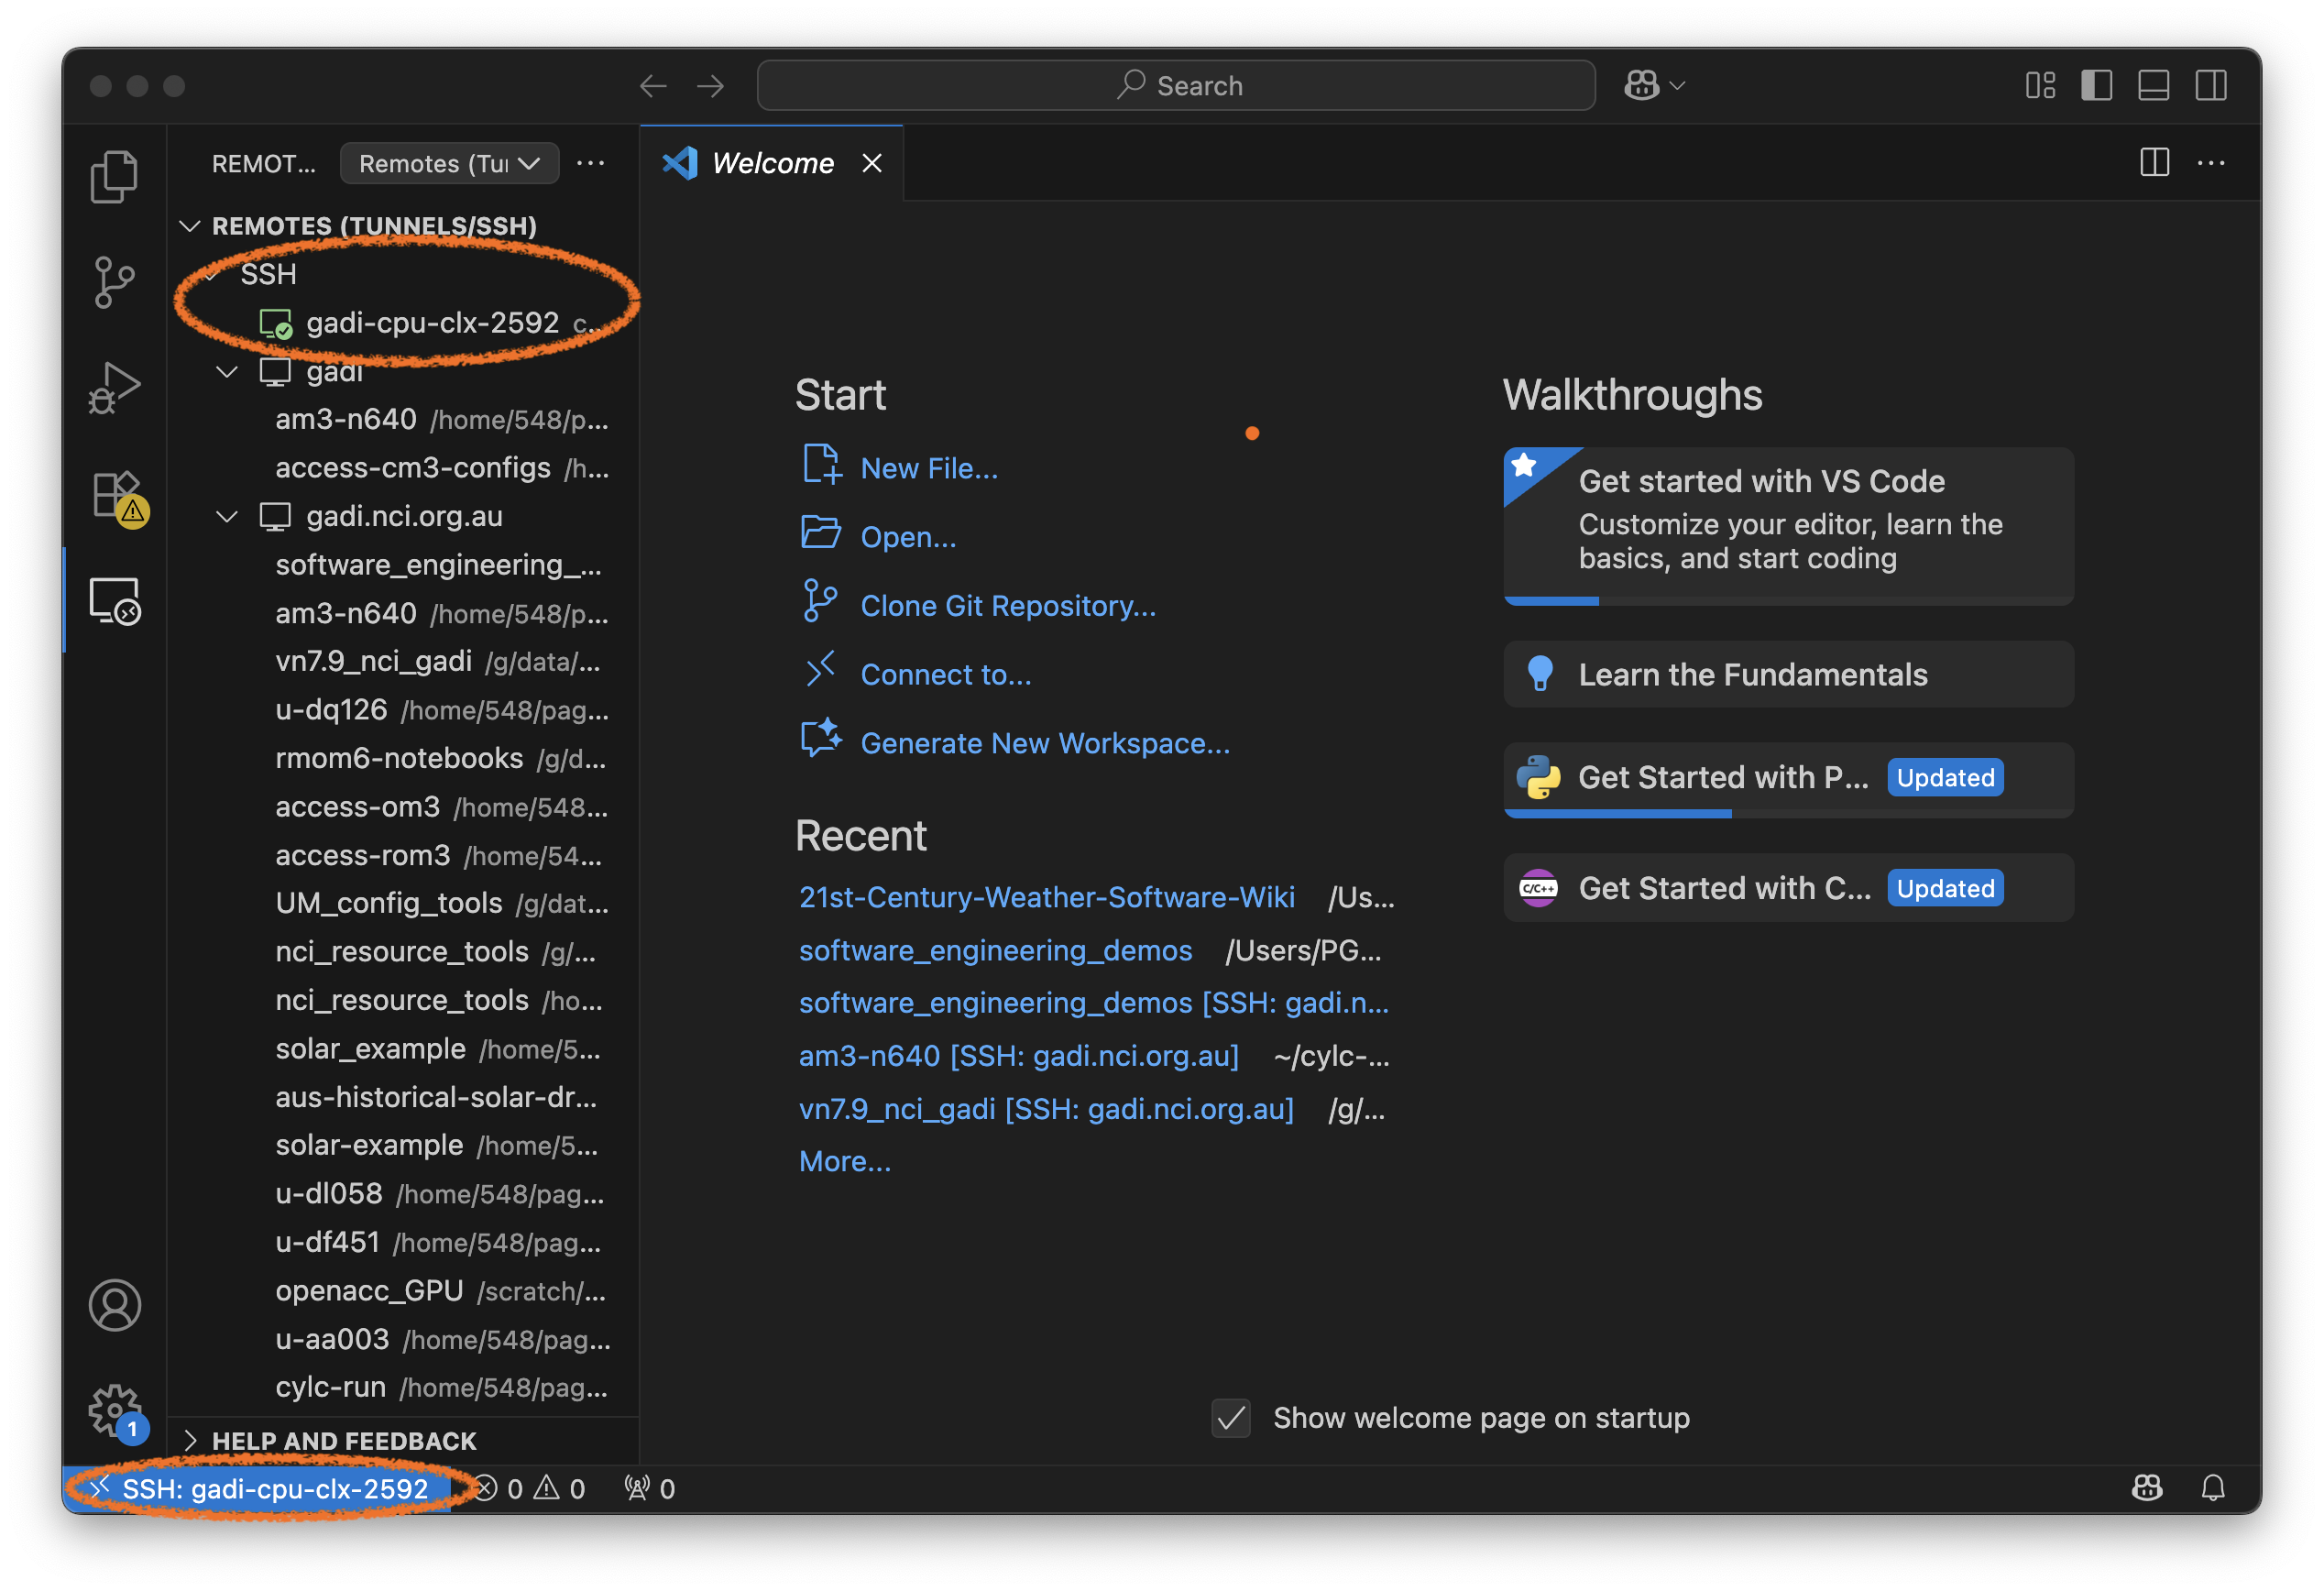
Now, click on the bottom-left corner to bring up the Connect to Host option inside the Command Palette window.
Select your gadi compute node. If it is not active, use the option to + Add New SSH Host and type
gadi-cpu-clx-<you gadi compute node ID>
A VSCode pop-up window will ask you about the authenticity of host gadi-cpu-clx-<you gadi compute node ID>. Type yes into the window and hit Enter.

Note
The connection might fail the first time. It will usually succeed after three attempts.
A successful connection will result in the gadi compute node showing in the bottom-left corner, and in your Remote Explorer.